Thursday, May 31, 2012

Uralisti at the PBTF Publicity Shoot

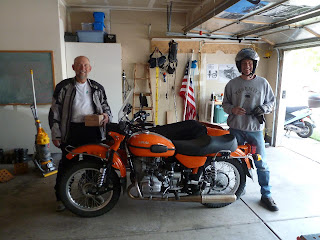
Yesterday, I had a chance to join four fellow Uralisti in providing sidecar support for a publicity shoot at local TV station KWGN (CW2, Colorado's Own).  They were providing air time for the upcoming 2012 Pediatric Brain Tumor Foundation's Ride for the Kids.

Rachel Ward, the task force leader, had coordinated the whole thing via email along with the help of Chris Brigg's the mother of one of the PBTF's beneficiaries.  James, has ridden in my sidecar rig the last two years during the Colorado Ride for Kids.

Please click on the link to get more pictures, details and a view of the video shot by Channel 2 to help publicize the event.   CLICK HERE.

Dave S's dog Humphrey with his doggles, enjoying being petted
by two of the PBTF kids.

Tuesday, May 29, 2012

Uraling once again to the top of Mount Evans


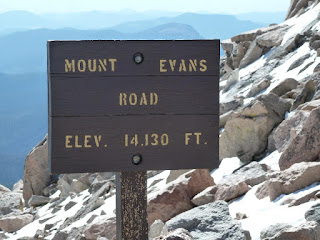
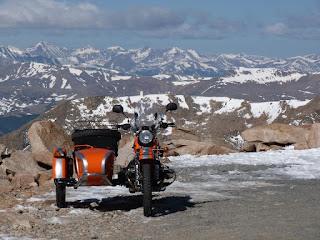
Another beautifully sunny Spring day here in the great state of Colorado and it was time to introduce Valencia, my 2011 Ural Patrol Sidecar Rig to the summit of Mount Evans. Billed as the nation's highest paved road, CO5 or the Mount Evans Road is paved all the way to 14,130 feet above sea level and is a beautiful drive not far from the Denver Metro Area.

I arrived at the National Forest Service Fee Station near Echo Lake and paid the $3/person fee for motorcycle riders.
I took I-25 to I-70 and cruised westward on I-70 into the mountains. The ride was smooth though windy, with very light traffic due to the Memorial Day Holiday. I'd left the house shortly before 6:30 AM and was Idaho Springs shortly after 7:30 AM to fuel up.

Traffic remained light as it was just shortly after 8:00 AM or so when I left the fee station and at times it felt I had the entire road to myself! I cruised slowly up the winding Mount Evans Road and was soon above the treeline and enjoying the scenic views of distant peaks, plunging precipices just off the unprotected roadside, and the distinct feel of cooling temperatures as I gained altitude.

Taking pictures along the way, I still made good time to the summit of Mount Evans and paused for a quick break in the sparsely filled parking lot. The temperature was in the low 20s so I did not linger at the top for long. I spent more time cruising slowly back down the mountain, taking pictures at the apex of the hairpin turns mostly but sometimes parking on spots where it was safe to do, right up on the edge of the steep drop offs.

There is still some snow remaining on the mountain but it was such a mild Winter this year that what little remains won't last long I fear; even with the bitter cold at the top third of the mountain!
Once back on CO 103, I turned East and with some detours to explore forest roads where I found folks target shooting, ended up riding past Squaw Pass and soon turning onto Witter Gulch. This road takes one down to Upper Bear Creek Road which then you can ride East towards the mountain town of Evergreen with its big lake and golf course.

The crowds were out at Evergreen, enjoying the cool sunny weather. I took CO74 ever Eastward, through the small towns of Kittredge and Idledale and soon reached the town of Morrison which was bustling as well with folks out enjoying the weather. The road home from there was just slab time mostly on US285/I-25/I-225 to Parker Road and from there to my home neighborhoods.

I was home shortly after Noon, a bit over 130 miles ridden. As you can tell, the summit of Mount Evans is within easy driving distance of Denver as I mentioned, quite worth it as a day trip!

 Echo Lake


 Summit Lake


Sunday, May 27, 2012

Memorial Day Weekend

Yesterday evening, I motored to the Fort Logan National Cemetery to pay my respects to the many Soldiers, Sailors, Airmen, Marines and their family who rest there.

As do many others, I use this posting to remind folks that they have this long weekend to remember those who've given their all in the service of our country.

I first spent a few minutes at the grave site of SSGT Brian Joiner, the son of a friend of mine, who served with the US Air Force.


Flanked by Army Men, Brian is in good company.

His portion of the cemetery is all filled up now and the grass is fully grown in, it seems like yesterday that I first visited the site and it was just bare ground and tiny metal holders containing a piece of paper listing the names of the recently buried.

Brian's Section

I spent some time afterwards just riding through the extensive grounds, watching row upon row upon row of gravestones, lined up precisely as if in formation.  There were less than a half dozen cars with visitors in the cemetery while I was there.  Folks visiting their interred loved ones, probably there today to avoid the hopefully large crowds that will be there tomorrow, on Memorial Day Monday.  I too preferred the relative solitude of the evening; I'll pass on the speeches and crowds.

Sunset at Fort Logan National Cemetery

Martha and I thank our fellow Veterans, both those of years past, and those in the present, for your service to our country.  If you know a Veteran, take a minute to thank him or her....better yet, go to your local National Cemetery and be reminded of what Memorial Day means.....


Wednesday, May 23, 2012

Rainy Ride

Just a short posting, went for a short 20 mile ride around the home neighborhoods.  Started off just as the rain was starting, that good old Colorado rain.  We've not seen much of it in the Denver Metro Area and so it is quite welcome even though its quite cold.

Rainy afternoon ride.

Played with the above pic using Google Photo's HDR effect tool.  Didn't come out too badly, don't you think?

Sunday, May 20, 2012

Valencia's got a new clutch!

Craig and Darrell, fellow Uralisti and mechanical gurus, showed up a bit before 9:00 AM today at my home on their Ural rigs...ready to show/help me install the new clutch components onto Valencia, my 2011 Ural Patrol.

From previous posts, you know I had "smoked" the clutch on Valencia while attempting to reach the summit of Engineer Pass near Ouray, CO.  The trouble was, the clutch was not properly adjusted and the conditions and my constant "slipping" of the clutch caused component damage.  This caused "suboptimal" clutch operation and led to Valencia being sidelined the last two weeks while I waited for parts and Craig's time.

Craig walked us through the dismounting of the engine from Valencia's frame, the process went incredibly smoothly and soon we had the engine out and onto the workbench without anyone getting injured!

Getting ready to remove the transmission from the rear of the engine

The transmission slid off easily, and good news, the drive splines were fine!

 While I blocked the flywheel from moving with the screwdriver above,
Craig removed the staked material holding the six clutch screws in place.
I then loosened the screws with an impact driver and they came off easily enough.
I buggered up the screws pretty good this way but was replacing them with better ones.

 OK, mounting plate off, the outer clutch plate is visible and noticeably damaged!
               
 I pried the outer clutch plate off and look at all the loose clutch material
that was just separated and crumbling.

 The above picture shows the inner clutch plate which had all it's clutch material
completely crumbled off!

 The above shows the thrust plate where the springs go, note the
pile of crumbled clutch material at the bottom portion of the flywheel!

 All that remains of the inner clutch plate's material.

Note the heat discoloration on the thrust plate above.

 One last view of the old springs, the crumbled clutch material and the
flywheel which appeared undamaged but coated with clutch material/dust.
                            
 Much cleaning, blowing by compressed air, and use of vacuum cleaner later,
the new clutch springs are placed into the new thrust plate within the flywheel.

 The above shows the outer clutch plate in position, the intermediate plate and inner clutch
plate are already below it and it's time to align the plates with the Ural tool that Craig brought.
Note how tight a fit it is into the flywheel. 

 Using two M8 x 1.00 bolts and nuts, we compressed down the cover plate 
(after a couple of careful alignment attempts) and finally got it to go into the tightly fitting 
gear grooves of the flywheel.  I was sure glad to have Craig for this part, I would have 
messed it up for sure!

 Cover plate is in and the new allen-headed clutch screws are in place and
the use of red loctite was ensured.
          
 I put the clutch release rod into the square hole where it meets the engine drive spline,
then it was a simple matter of sliding the transmission onto the release rod.  A little
alignment, nudging, some light blows with a rubber hammer and the transmission was on!
It helps also to move the rubber donut to align the splines.

We got the engine into the frame with very little problems, though we did find out that the mounting rods are of different length!  Still, we swapped them easily enough and from that point on it was a flurry of reconnecting activity by myself and Craig.  Darrell had assisted during the engine mounting and dismounting and other portions but mostly he did tire swaps for his rig and also ferried his stepson over to the zoo.  I sure was glad he was there for the engine moves though, the sucker is heavy!

 The only photo taken of the work involved with hooking all the cabling back up, remounting the carburetors, re- installing the starter, the ignition system, putting the final drive back on, the rear wheel, 
the battery and finally the gas tank. (there's more to it but those are the main items).

 We put a bit of gas into the tank, and she fired up on the second attempt after engaging the 
chokes on the carburetors.  Success!  Craig had adjusted the clutch cable and it was
spot on in terms of clutch movement!  Houston, we have clutch action!

We all donned riding gear and went for a short check ride, Valencia did great and her clutch permitted smooth up and down shifting of gears once more!  The idle was a bit high but I would end up fixing that up later.
     
 Here are Craig, Valencia and Darrel.
My profound thanks to both of you for giving up your Sunday to help!
Thanks especially to Craig and his confident expertise and advice throughout the process.
I couldn't have done this without both of you.

 A parting shot of the guys, Darrell above on his Patrol
and Craig below on his Gear-UP Rig.


The guys headed home while I put away all the tools and I cleaned up the garage.  There sure was a lot of clutch material dust all over the work area!  Once everything was squared away, all the other vehicles put away and things cleaned up; it was time for a social commitment.

I rode Valencia to get her fully gassed up and picked up my youngest son to go to a friend's daughter's high school graduation party.  It felt great to be riding Valencia again and she was running great!

All is well with my motorcycles once again.  I have to do some minor tweaking of the carbs on Valencia but that will wait till tomorrow.  We also found the locking ring on the spare wheel to be stripped so I'll be getting a replacement under warranty hopefully.  We found this while mounting what had been the spare as the pusher tire.

All in all, a great tech day, I learned a lot about the clutch on a Ural, how to dismount the engine, some tricks to remounting the final drive and how to adjust the proper angle of the rear brake pedal.  Also covered were how to properly adjust the clutch (both major and minor adjustment points) and I enjoyed the help and camaraderie of fellow Uralisti.

Thanks Guys!  I am in your debt.


Saturday, May 19, 2012

Ready for Surgery

A bit over two weeks now since I returned from the "In Between Jobs Ride" with Valencia, my 2011 Ural Patrol.  I had "smoked" the clutch attempting to reach the summit of Engineer Pass near Ouray, Colorado but she got me home.

Replacement clutch parts have arrived and I spent yesterday afternoon after work and this morning taking parts off the tug so we can remove the engine.  The plan is to remove the engine tomorrow, with the help of a couple of fellow Uralisti and the guidance of Craig H who's done the operation before.  We will be replacing all of the clutch plates.  The theory is that one or both of the below listed #1 parts got overheated and parts melted causing things to "stick" together.

Everything above is being replaced, for good measure.

In the process of dismantling, I examined the components involved and cleaned as I went.  No real major issues encountered, a stubborn nut here and there but nothing a little patience and force couldn't overcome.

One piece of good news, I was able to examine the thrust ball bearing which is part of the mechanism that pushes the clutch release rod into the clutch plate assembly.  I'd read on sovietsteeds.com that this could lead to clutch failure and I had been a bit worried.  Mine turned out to be fine!  :)    Lucky for me that it was, apparently the list price for this special bearing plate from SKF is $99!


The thrust bearing is #4 above.
All of Valencia's components appear OK.

There is a guide on Bill Glaser's myural.com website that details the procedures not only to remove the engine from the frame, but to disassemble/assemble the clutch actuating mechanism, clutch assembly and removal/installation of the final drive and rear wheel to make room for things to be removed!  A must read/use website by any Ural owner:  myural.com..

Along the way as I took things off Valencia, I noticed a hole where there shouldn't be one in the small u-joint located next to the final drive, I cleaned it off and damn, I am missing a grease zerk:

Apparently, the newer Urals now sport a grease zerk in the driveline U-joints.
Mine apparently fell off somewhere in the last 5000 Km.

So this morning I rode over to the nearest NAPA dealer and the 6mm Grease Zerk fit just fine.  It's now mounted with red Loctite.  I'll have to watch this u-joint, who knows what crap got into it in the last 5000 Km.

In case you were wondering what the heck a zerk is...

So, the engine is ready to be dismounted tomorrow.  

 The "operating" area
We'll dismount the engine and work on it while
it sits on top of the small workbench

 The tool table, some of the components I removed are underneath
ready to be re-installed.

Valencia, ready to have her engine removed.

Hope the clutch assembly removal and installation of the new components goes well tomorrow.  Wish me luck!

Friday, May 11, 2012

Yoshie is back online...

In my previous post I'd mentioned how I'd gotten Yoshie, my 2006 Suzuki V-Strom/Dauntless Sidecar Rig returned to me in less than optimal conditions.

I've since taken receipt of a brand new rear wheel for the V-Strom ($1023.00 cost to the insurance company) which seems high to me but since it's not my money.  The insurance rep had a "talk" with the service manager who assured him that he'd be taking actions to prevent such glaring screwups from happening again.  I've my doubts but since I can't really influence things, am moving on.

Once I got the new wheel (which the dealer mounted my summer car tire on) back on Yoshie, she rode much better without having the rear wheel wobbles!  Go figure.

Then I found the DOT4 Brake fluid level low on the clutch circuit, sigh.  Refilled and it seems I caught it in time before air was introduced into the system.

Spend the last two days getting her sidecar alignment back to correct toe-in (it was set up wrong by the dealer's techs).  They also somehow managed to mess up the wiring going to the sidecar.  Not sure why they even messed with that but there you go.  Finally got the lights working as they should and a couple of test rides later, I believe Yoshie is operational once more.

So, once again, I've a working sidecar rig for when the weather is bad or I need to carry cargo.  Valencia's replacement clutch parts are rumored inbound, perhaps arriving even today.  Still over a week to go though before I'll have access to a fellow Uralista's expertise on mounting said repair parts.

Saturday, May 05, 2012

So much for having a spare sidecar rig!

As I rode Valencia, my 2011 Ural Patrol Sidecar Rig home with an ailing clutch on Thursday of this week, I was thinking to myself: "Good timing on the part of the Suzuki dealer, having Yoshie, my 2006 Suzuki V-Strom DL1000 Sidecar Rig ready for pickup".  Yoshie would function as my spare sidecar rig while Valencia awaited parts and the repairs scheduled for the 20th of the month.

Sigh, alas it was not to be.

The dealer elected to deliver the rig back to me stating that I should verify the sidecar's alignment myself before taking it out on public roads.  OK I said, that's reasonable as they don't do sidecars every day.

Yoshie was dropped off this morning and I geared up for a short ride around the neighborhood to see how she felt before I got down to the business of checking the sidecar's alignment and such.


She felt a bit weird in the rear but I shrugged that off as having been away from here over two months and having been on my Ural most of that time.  At a stop light, a Harley Davidson rider pulls up to me and yells: "Dude your rear wheel is moving back and forth!".   As you can imagine, a disconcerting remark to say the least!

We both pulled off into a shopping center's parking lot and he pushed Yoshie a short distance while I watched from the rear and damn if the tire wasn't wobbling back and forth!  Dammit.

I thanked the HD rider, and rode slowly back home.  I dismounted the tire, thinking perhaps it was a damaged tire that was causing the wobbles.  I had no luck getting the tire off.

Breaking the bead on the cut tire

I ended up cutting the perfectly good snow tire off using a sawzall.  Once I got the tire remnants off, I put the rear wheel on the ground and found it to be warped!


Yep, in spite of me telling them from the onset that I thought the wheel was bent....the dealer's tech declared the rear wheel as fine.  He told that to the insurance adjustor who believed him and so it was not part of the cost of repairs!  I figure it'll be close to $300 to replace the warped wheel with a new one, associated bearings, new axle and mounting a car tire onto it.  How much would you like to bet this amount might have pushed the cost of repairs over whatever magical mark the insurance guys follow in order to "total a bike"?

Now here Yoshie sits in my garage, sans her rear wheel/tire.  The replacement tire won't get in till the 9th so that's the earliest I can expect to be able to pick it up with a tire mounted on it.

Yoshie awaits her new wheel

Then, you have to wonder what other damages lay hidden awaiting me in the future.  I will surely write a letter to the General Manager at the Suzuki Dealer, his diagnosing tech sucks!

So, now I have two "down" sidecar rigs awaiting parts.  Luckily, there's Brigitta, my 1987 R80 Airhead Beemer, ready to take me to my first day of work on Monday.  

See, plenty of room for two rigs in my garage....